Magento - D·engage Integration Phase 2
Dengage Magento Integration phase 2
Open Magento Admin
Log in using your credentials.
Go to “Dengage CDMP” from the sidebar, this will open a configuration page.
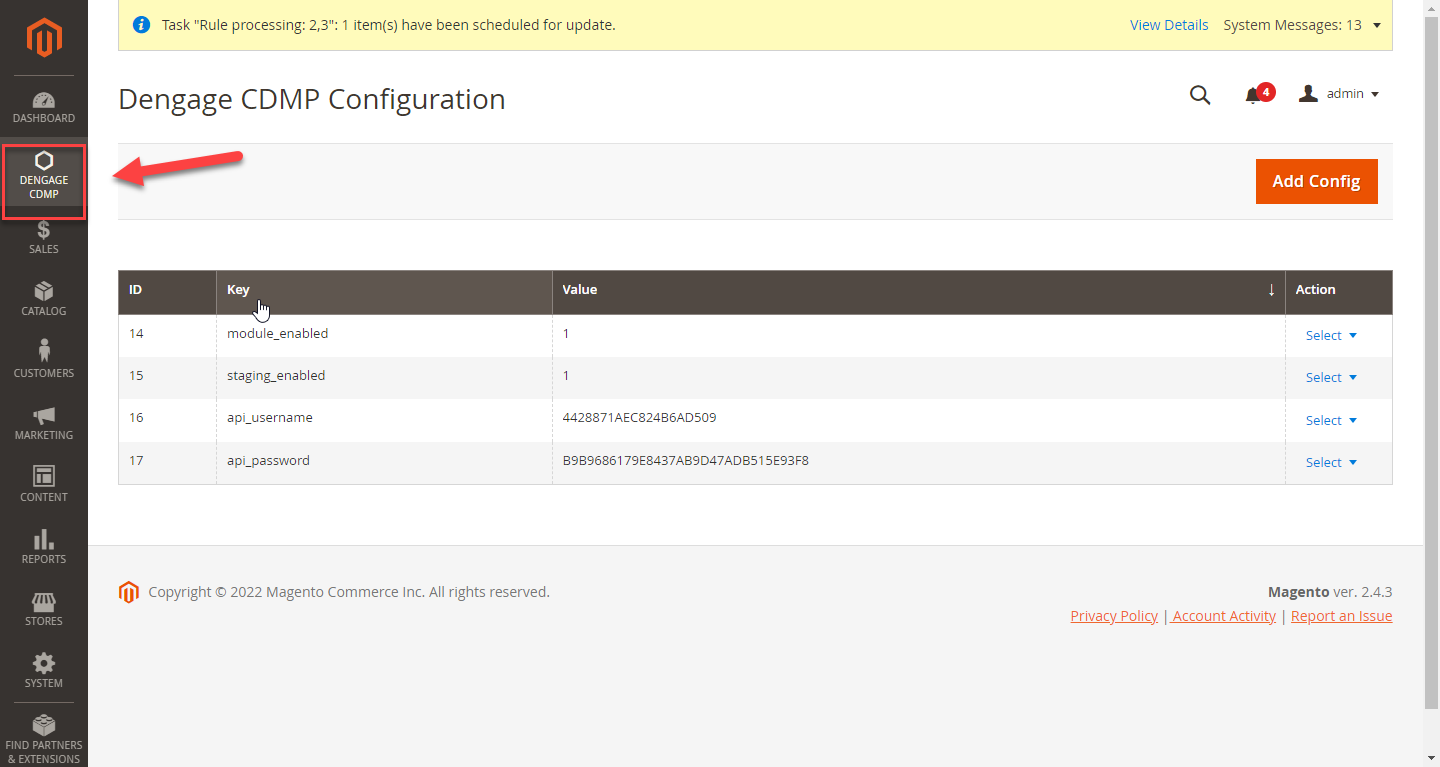
Configurations to be Added
Now you need to add the following four configurations in order to synchronize data.
api_username
api_password
module_enabled
staging_enabled (only used for the staging environment)
sdk_script (for configuring Dengage SDK)
How to add configurations
Click on the “Add Configuration” button.
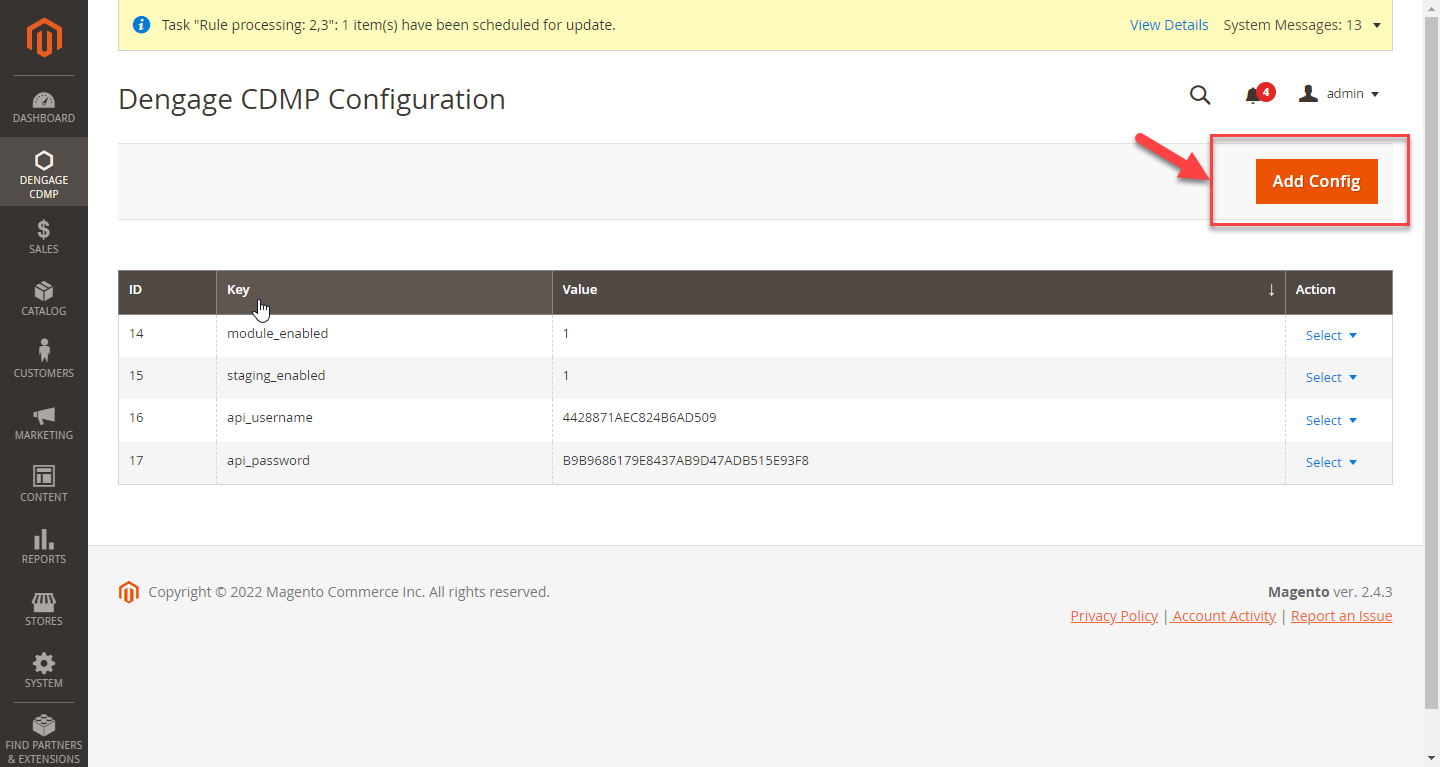
“Dengage Configuration for New Config” page opens.
Enter the required Key, and their values, and hit the save button.
The system will display a success message “Record successfully Update”.
Once the required keys are saved, click on the back button.

You can see, that the system shows all the keys and the values you have just added/updated.

- Above mentioned all four configurations are required for data syncing. Let's verify data sync for customers, products, and orders one by one.
- To add a customer, go to the customer module and click on add button.
Enter details and click on the Save button.

- Once this customer is saved, it will be reflected in CDMP “master_contact” table. To verify the details follow the steps below:
- Go to CDMP-> Home-> Segments.

- Create a new segment as shown below.

- Add filter as contact field and choose email, as an example I’m using “burhan.001@yopmail.com” that is recently created from “Magento website” .

Now apply the filter and hit calculate button.

You can expand the record and verify details from here as shown below.

- You can also edit any existing record and it will be updated in CDMP.
- In the same way, you can add products and orders in magneto.
- For product creation, go-to products from the catalog.

- Add a new product from the ‘Add Product’ button and fill in the detail.

- Save the product and it will be displayed in the product list as shown below.

- To verify product sync on CDMP, go to tables under dataspace.

- Go to the product table and list records.

You’ll see products from magneto are synced and displayed here.

- Products updated from Magento will also be updated on CDMP. Also, you can create product variants from the magneto website.
- To create product variants, edit any product.

- Click on create a configuration.
- The first step is to select attributes, create new attributes or choose from the list, as an example, I’m choosing a color attribute from the list.
- The second step is to choose attribute values. You can select an attribute value from the list and click on the ‘Next’ button to continue.

- Now select the option for Bulk Images, price, and quantity.


- Click “Next” and you’ll be redirected to the ‘Summary’ page.

- Now click on the “Generate products” button and you’re done creating product variant.


- You can verify this sync in CDMP ‘Proudct_variant’ table.
- Let’s verify orders sync now.
- To create an order, go to Sales -> orders

- Click create new order button.

- Select a customer for whom you want to create order.

- Now select products from the list and add them to the order.
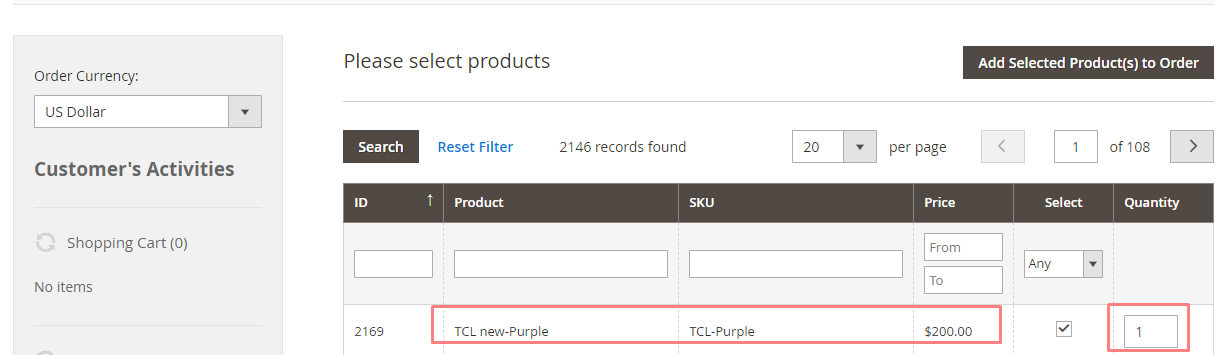

- Fill “billing information” and shipping details and hit “submit order”.

- Your order will be placed and displayed in the list.

- Orders will be reflected in CDMP ‘Orders_details’ table.
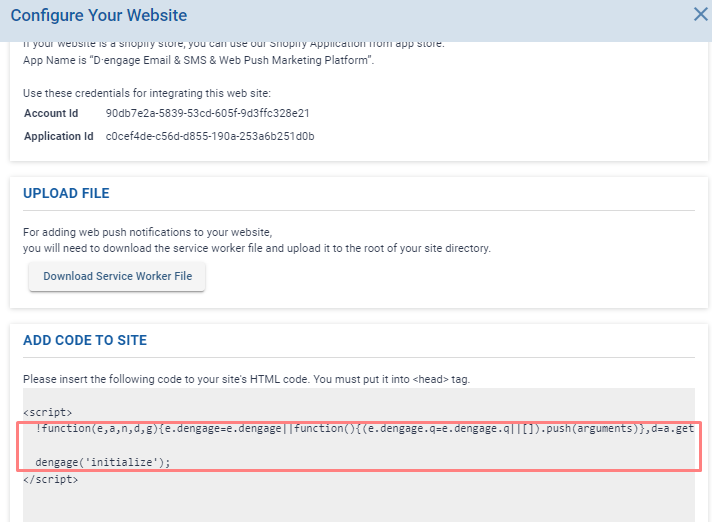
How to find SDK Script Value from CDMP:
Login to CDMP and go to Settings--> Applications.


Configuration for “Events” in “Magento Website”:
- Login to Magento Admin Panel.
- Click on “Dengage CDMP” Menu for entering configuring events for syncing data in “CDMP”.

- Now click the “add config” and enter scrip value that is copied earlier from CDMP.
- Click on “save” button and you're done.

Now user can perform “events” efficiently.
Related Articles
Magento - D·engage Integration Phase 1
D·engage is now able to integrate with the most go-to Framework for Ecommerce, i.e Magento. With this integration, you will be able to sync the following data from your Magento Website to D·engage CDMP: Contacts Products Product_variant Order ...D·engage GTM Integration
There are two different ways for GTM integration. You can create new google tags as well as, you can use existing ones. (a) Using Existing Tags for Sending Events Data In order to use your existing triggers to send data to the D·engage platform you ...Mixpanel - D·engage Integration
Mixpanel is a leader in the product analytics space, that provides real-time insights into app/website interactions and leverages brands to devise effective marketing strategies according to their customer behavior. D·engage provides an ...SurveyMonkey - D·engage Integration
With the SurveyMonkey integration, you can now import survey responses directly into your D·engage account, enabling you to enrich your Master_Contact table and build segments based on audience responses to create a more personalized experience. ...Neto Integration
Neto D·engage Integration In a matter of minutes, without a single line of code you will become able to connect your Neto store to your D·engage account. This integration is a one-way sync that sends your product catalog as well as your contact and ...