Microsoft Dynamics CRM 365 Integration
Pre-requisites Columns for CRM Integration
master_contact crm_opportunities contact_key opportunity_id name contact_key surname name email description email_permission parent_account_id email_status status gsm rating gsm_permission sales_stage gsm_status close_probability originating_lead_id total_amount entity_name total_discount qualifying_opportunity_id estimated_close_date parent_contact_id actual_close_date parent_account_id
Support:
We are using two authentication methods.
Windows Authentication:
For windows, they need to provide
1) URL
2) Domain Name
3) Username
4) Password
Client Credentials: (for AD FS )
For this, they need to provide
1) URL
2) Tenant Id
3) Client Id
There is another thread running after every 10 minutes. This gets the last sync time and add the interval of 10 minutes as a next sync time.
Based on the last sync time and next sync time this thread fetch those records, which are created or updated within this period.
User can see the history of all these synchronizations on Sync History Page.
CRM Marketing Lists:
CDMP also support marketing lists synchronizing with CDMP. A background service is responsible to fetch all marketing lists from the dynamics CRM to CDMP and save them in dengage database. These lists gets update every day in order to synchronize with dynamics CRM.
- Select Microsoft Dynamics 365 under Dataspace>Integrations from the left menu bar.
- Click the “Connect” button against Microsoft Dynamics 365.
- Users can connect to both cloud and on-premises versions of CRM.
In order to connect to the cloud version, You need the following credentials.
- Organization URL (base URL of CRM dynamics)
- Tenant Id
- Client Id
- Client Secret
- Organization URL (base URL of CRM dynamics)
For the on-premises version, You need the following credentials:
- Organization URL (base URL of CRM dynamics)
- Domain Name
- Username (name of the user using CRM dynamics)
- Password (password of the user using CRM dynamics)
- Organization URL (base URL of CRM dynamics)
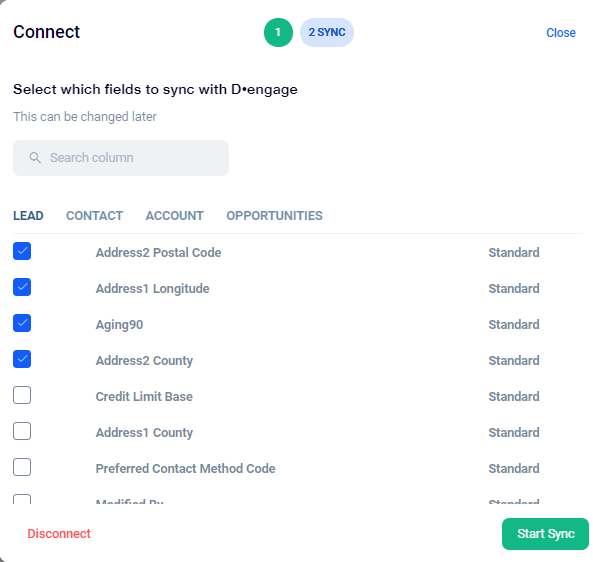
- Depending on your requirements, you can choose columns from “Lead”, Contact, “account” and “Opportunities”.
- To continue with syncing, hit the “start sync” button
- You can also get the sync details through email by clicking on the “Notify by email” option once the data sync is completed.
By clicking on the “Got it” button, you’ll be redirected to the details page where the status is shown as “Connected”
Here you can see the selected fields.


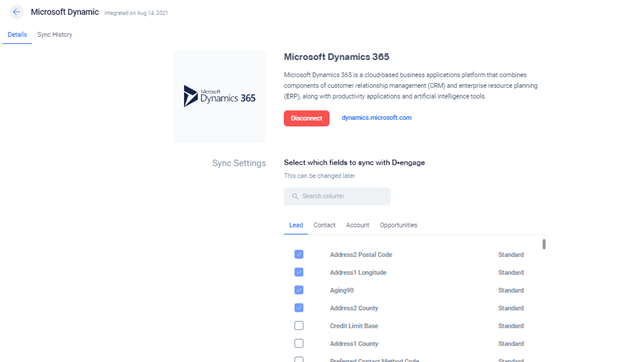
and the API details
Along with the details page, there’s a “sync history” page on which you can review the synced records.
- You can also search the records by giving the data type of synced records
 Searching only works with “Data Type” i.e. “Leads”, “Contacts”, “Accounts” and “opportunities”.For example, if you search “account” then all records with the “account “data type will be displayed.
 The records can be filtered depending on their “type” and “status”. On clicking the Filter option, a pop-up window will appear
You’ll get to see several options under the “Type” and “status” dropdown
Records can be filtered on the basis of their type as “Bulk sync”, “Updates” or “All”.

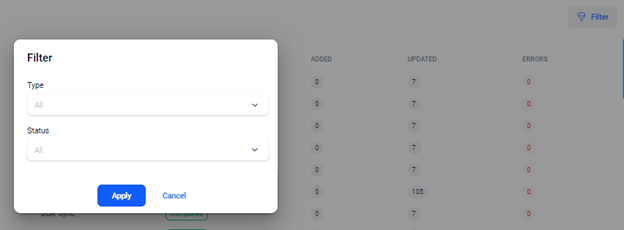

- To filter on the basis of record status, you have got “All”, “New”, “In-progress”, “Completed” and “Error” options
Hit the “Apply” button to apply the filter and “Cancel” to close the filter window.
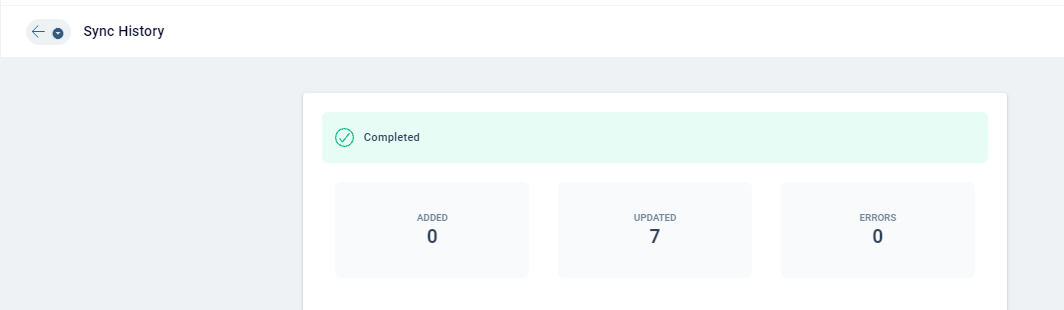
To see the details of the record, click on the data type of record
Records details window displays the status along with added, updated, and error count
Any change made in “contacts”, “Leads”, “accounts” from the “CRM” website is reflected in the “master_contact” table of Cdmp
You can always verify the change by creating a segment. As an example let’s create a segment with the condition “Contacts where master_contact → Entity name contains lead”
Now hit the calculate button and you'll be able to see the record count
You can click the record count to view all details as shown below
The same is the case with “opportunities”, any opportunity created or updated in the CRM website is reflected in the “crm_opportunities” table in CDMP
Now with the latest update, You can also sync marketing list data in Cdmp
Create or update a marketing list either “Static” or “dynamic” from a “CRM” website and add lead, account, or contact data to that list
You’ll be able to see the marketing list option while creating a segment in CDMP
Repeat the same process and calculate the segment results to verify records
At any stage, you can disconnect your Microsoft dynamics account by clicking on the “Disconnect” button ad there will be a confirmation pop-up
Hit “Yes, Disconnect” to continue and “Cancel” to return back to the details page


Related Articles
Neto Integration
Neto D·engage Integration In a matter of minutes, without a single line of code you will become able to connect your Neto store to your D·engage account. This integration is a one-way sync that sends your product catalog as well as your contact and ...D·engage GTM Integration
There are two different ways for GTM integration. You can create new google tags as well as, you can use existing ones. (a) Using Existing Tags for Sending Events Data In order to use your existing triggers to send data to the D·engage platform you ...Event Data Integration
There are two options to send Event Data to D·engage: 1. Send event data via D·engage SDK First, you need to create a website application to use the dEngage Web SDK. Go to D·engage Event SDK page for detailed instructions to 'create an ...Experience Module Custom Mobile Integration
Custom Integration¶ Custom Integration (Backend Side) Guide and Restful API Beta This integration method is in beta and not recommended for frontend use. Please check other integration methods. Introduction¶ This tutorial provides a very simple and ...Shopify Integration
Shopify D·engage Integration In a matter of minutes, without a single line of code, you can connect your Shopify store to your D·engage account. This integration is a one-way sync that sends your product catalog as well as your contact and order data ...