Shopify Integration
Shopify D·engage Integration
You can use this data to send personalized follow-up emails to your contacts, trigger automation to run based on behavioral data, create targeted micro-segments, define campaign conversion goals, and more.
Pre-requisites Columns for Shopify Integration
master_contact | product | product_variants | orders | orders_detail |
contact_key | product_id | product_variant_id | contact_key | contact_key |
data_source | title | product_id | order_id | order_id |
name | category_id | title | order_date | product_id |
surname | link | price | order_status | product_variant_id |
email_permission | image_link | discounted_price | order_source | quantity |
email | price | image_link | total_amount | unit_price |
gsm | discounted_price | stock_count | item_count | discounted_price |
gsm_permission | availability | store_name | discounted_price | |
email_consent_date | stock_count | payment_method | ||
gsm_consent_date | store_name | shipping | ||
last_order_id | tags | coupon_code | ||
marketing_opt_in_level | ||||
orders_count | ||||
state | ||||
tags | ||||
total_spent | ||||
verified_email | ||||
city | ||||
store_name |
Support:
Enable the Shopify Integration
- In your D·engage account click Data Space > Integrations and click Connect to start the configuration.

Enter your Shopify Store URL, API Key,API Password and Domain URL.

How to get Shopify API Details
Log in to your Shopify admin panel and go to the “Apps” menu. Scroll down and Click on “Develop apps for your store”
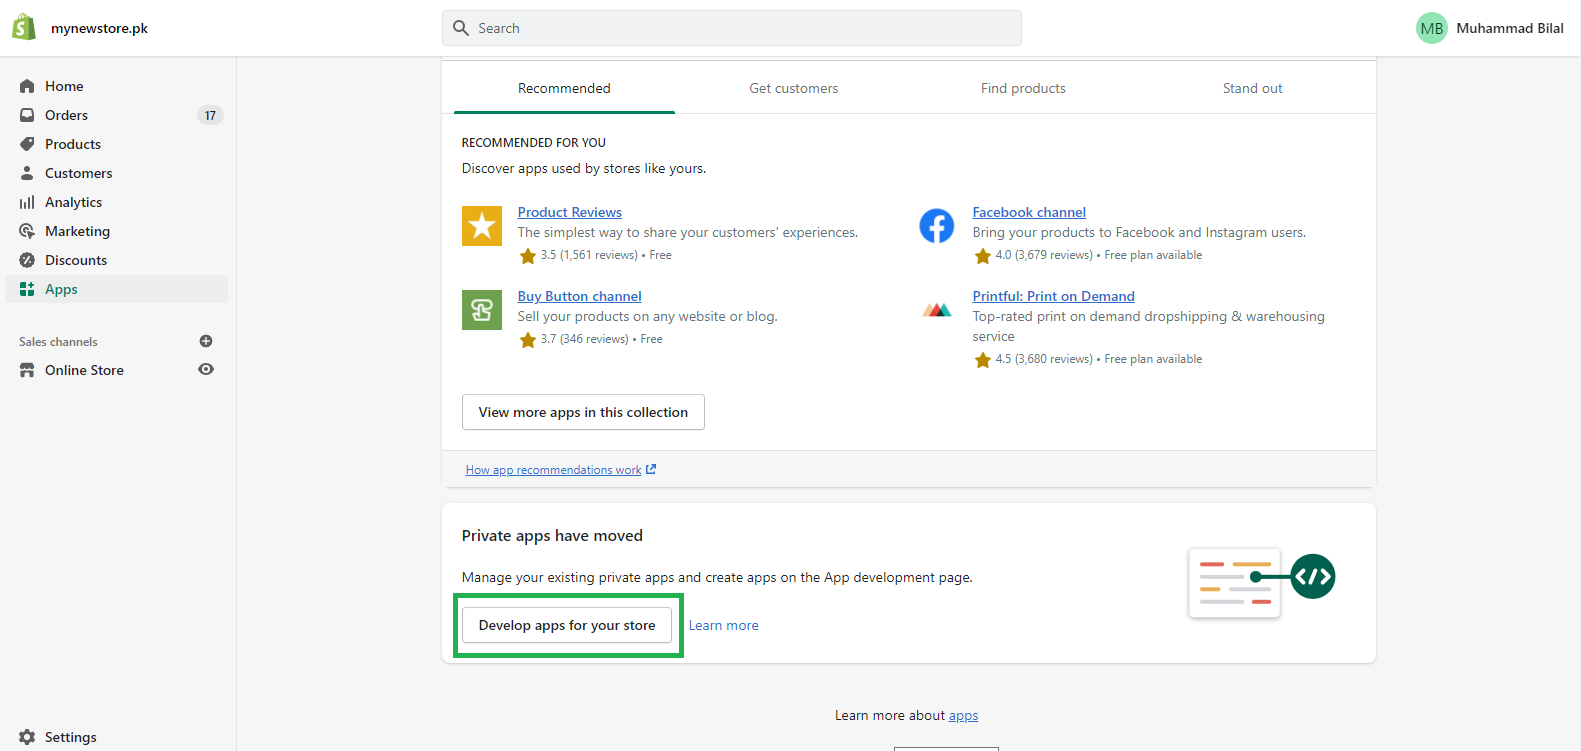
Click on "Create New App"

Enter App details; "App name" and "App developer email" and Click on “Create app”

Click on “Configure Admin API scopes”.

This will open a new page and show the list of permissions. From this list, you need to provide read and write access to the following and Click “Save”:
- Customers
- Discounts
- Orders
- Price rules
- Products
- Shipping

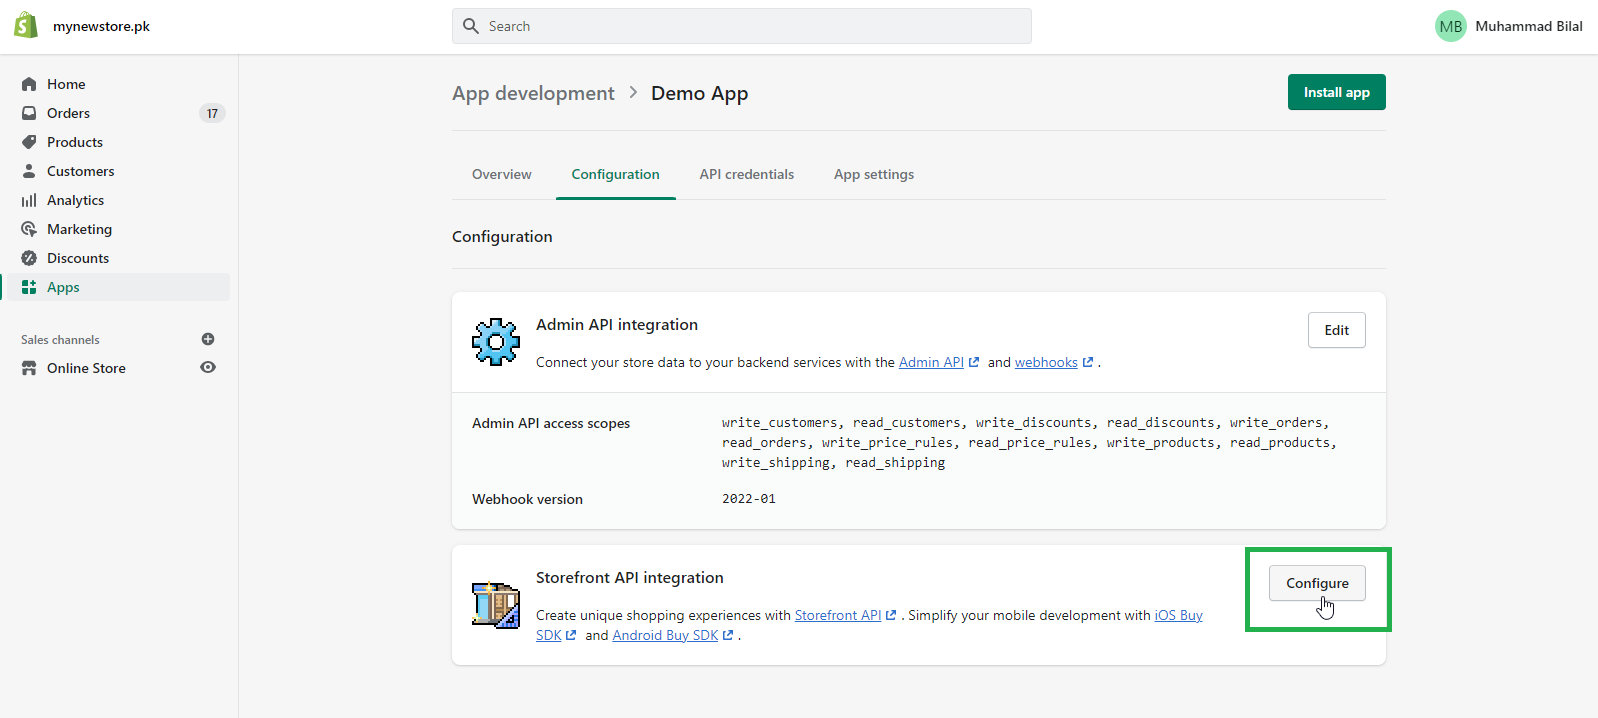
Now Click on Configurations again:

This will take you back to the previous screen.
Now Click on “Configure” for “Storefront API Integration”.
Now Select all options for following and Click on “Save”:
- Content
- Customers
- Products
- Price rules

Click on “API Credentials”

Now Click on “Install App”

You will get all the credentials.
Copy following credentials:
Admin API access token
API Key

SynchingData
Once your Shopify store is connected select the type of data you want to sync: Contacts, Products and/or Orders.
All Contacts and Product and Discounts data are synched. Order history can be synched up to a year.
Pre-Mapped Data Fields
Contact, Order and Product data come with pre-mapped fields. Please view the tables below for details.
Contact Data Pre-Mapped Fields
Product Data Pre-Mapped Fields
Order Data Pre-Mapped Fields
Managing Your Integration
You can manage the connection and view sync history at any time from the Data Space > Integrations page.

Disconnect Button: Clicking the "Disconnect" button will prevent future contact, product and order data from syncing into your D·engage account. Any data already synced from that Shopify store will not be deleted and will remain even after the store has been disconnected
Related Articles
How to Sync Shopify Segments
Now you can sync shopify segmnets to CDMP. Here are the detailed steps: Navigate to Data Space ? Integrations Now go to Shopify integration and integrate your account Once you’re done with integration, click on the “Segment Sync” tab Here you’ll ...Microsoft Dynamics CRM 365 Integration
Integrate D·engage with Microsoft Dynamics 365 CRM to gain better insights into audience behavior, improve productivity and performance, and get a single view of customers. D·engage integration fetches data directly from Microsoft Dynamics 365 CRM ...Experience Module iOS SDK Integration
iOS SDK¶ Dengage iOS SDK for sending visitor behavior and rendering product recommendations. Important warning ProductView, Basket Add/Remove, View Basket, Purchase and Click events must match productId. Introduction¶ This tutorial provides a very ...Experience Module Android SDK Integration
Android SDK¶ Dengage Android SDK for sending visitor behavior and rendering product recommendations. Supports Android 4.4 and higher devices. Important warning ProductView, Basket Add/Remove, View Basket, Purchase and Click events must match ...Neto Integration
Neto D·engage Integration In a matter of minutes, without a single line of code you will become able to connect your Neto store to your D·engage account. This integration is a one-way sync that sends your product catalog as well as your contact and ...