Advanced Personalization Whatsapp
WhatsApp - Customization and Advanced Personalization
WhatsApp Advanced Personalization lets you send customized WhatsApp messages using pre-approved templates. By adding variables to your template, you can personalize each message with dynamic content-such as a recipient's full name or other custom details-making your campaigns more engaging and relevant.
Preparing the WhatsApp Template
Start by creating your WhatsApp template. Go to Content > Messagings > WhatsApp, click New, and choose a category such as Marketing or Utility. On the content creation screen, you will see the + Add Variables button wherever personalization is supported.
When adding a variable, specify its name carefully. The value for each variable will need to be provided at the time of sending. For example, you might add a variable called name to greet each contact personally. Keep in mind that templates containing only a variable as the main content will be rejected by Meta, so make sure your message includes meaningful text as well. Once your template is ready, submit it for Meta's approval.
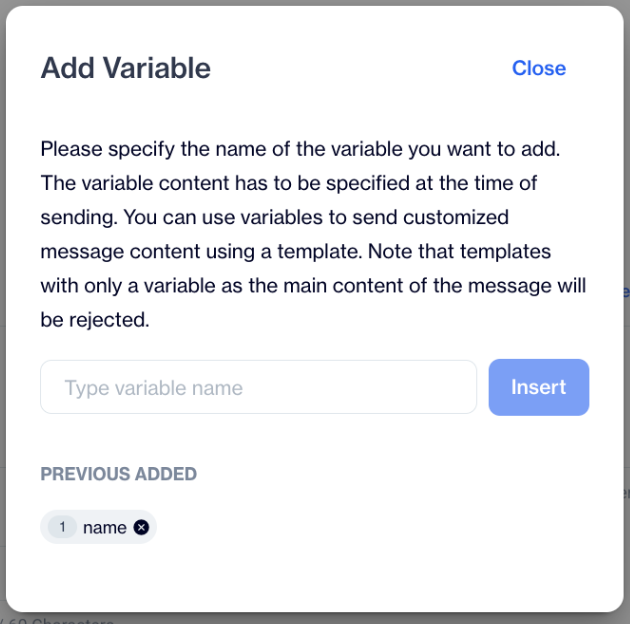
Add Variable
Creating the Campaign Flow
After your template is approved, move to Campaign > Flows to set up a new campaign. Define your audience and drag the WhatsApp action node into the flow. Double-clicking the node opens the configuration panel, where you select the appropriate provider, account, and the template you just created. Clicking Next takes you to the Message Details screen. Here, you will see a Customization button, which allows you to configure advanced personalization for the selected template.
Customization
Inside the WhatsApp Content Customization modal, each variable you added to the template will appear. Click on Add Customization to assign a value to each one. The Custom Selector allows you to pull data from different sources, such as Contact Columns, Columns from Segments, or Columns from Table. For example, if you add a variable named name and select Full Name from Contact Columns, the system will automatically insert each recipient's full name when sending the message.

Adding Personalization
Advanced Personalization
For more complex scenarios, advanced personalization supports JavaScript syntax. This allows you to create conditional logic, formatting, or custom calculations within your message. All advanced methods and examples are explained in the Advanced Personalization Developer Guide.
Related Articles
Advanced Personalization in Onsite
In onsite content, you can customize any field where the Add Customization button appears. For example, you can apply customizations in the Title, Message, and Links fields. Visual Editor When you click on the customization icon in the Visual Editor, ...Advanced Personalization in Email
Advanced personalization in email content allows you to dynamically tailor messages using contact data, segment fields, send list table data, or predefined dynamic content. You can either use the Add Customization button for easy insertion or write ...Advanced Personalization in In-App
In in-app content, you can customize any field where the Add Customization button appears. For example, you can apply customizations in the Title, Image, and URL fields. Visual Editor When you click on the customization icon in in-app content, the ...Advanced Personalization in SMS/MMS
In the Message section of your SMS or MMS content, you will find the "Add Customization" button. Using this, you can insert dynamic content directly into your message via the customization selector, allowing each recipient to receive highly ...Advanced Personalization in Push Notifications
In the Title and Message fields, you will find the "Add Customization" button. This allows you to embed dynamic content directly into your push notifications using the customization selector. For even more powerful targeting, you can leverage the ...