Web Push SDK Setup
Requirements
- D·engage Application Definition - Required for configuring push notification settings.
- Access to your Website Files - Needed to add the Service Worker File and the Injection Script.
D·engage Web SDK provides an interface that handles device subscriptions and web push notifications. Optionally, it also provides event tracking functionality for your website.
1. Creating the D·engage Application
To use the Web SDK, create an application and set up push notification configuration in the D·engage platform, then add the Service Worker File and the Injection Script to your website.
1.1 Navigate to Settings > Applications. Click New to create a new application.
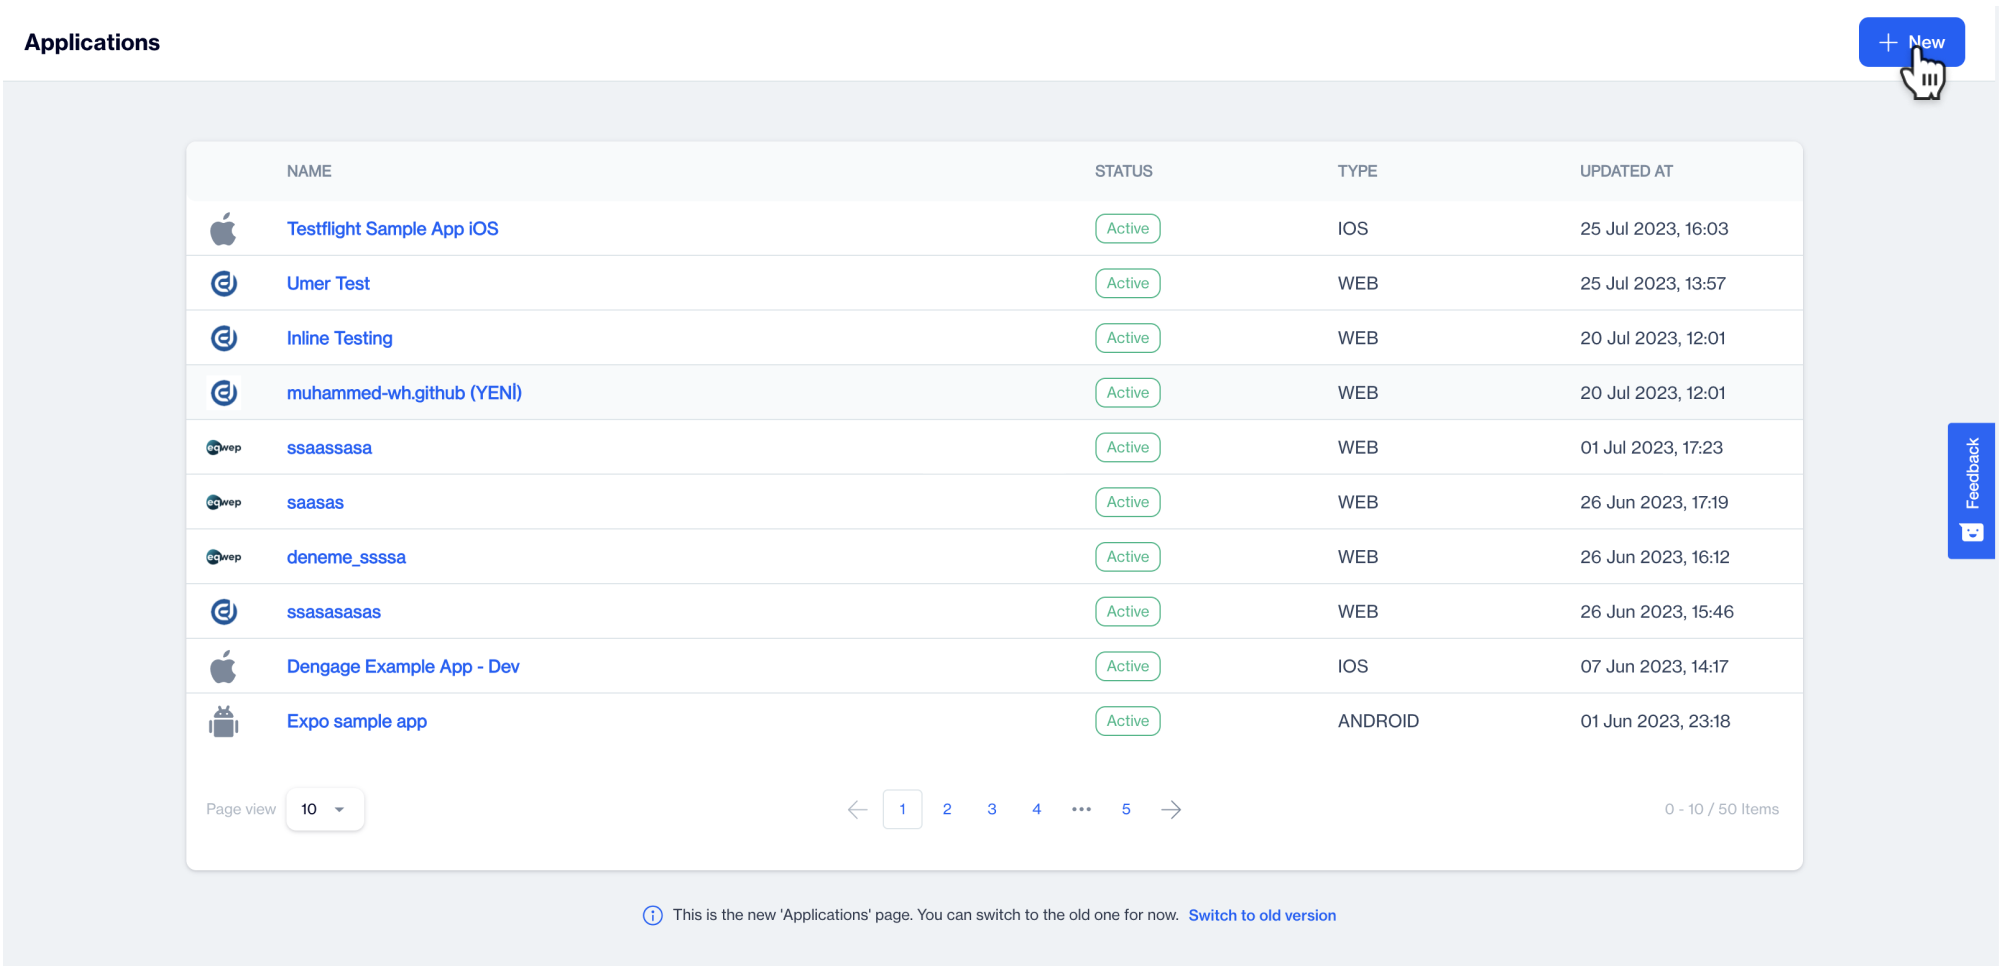
Applications
1.2 Select Website from the modal that appears.
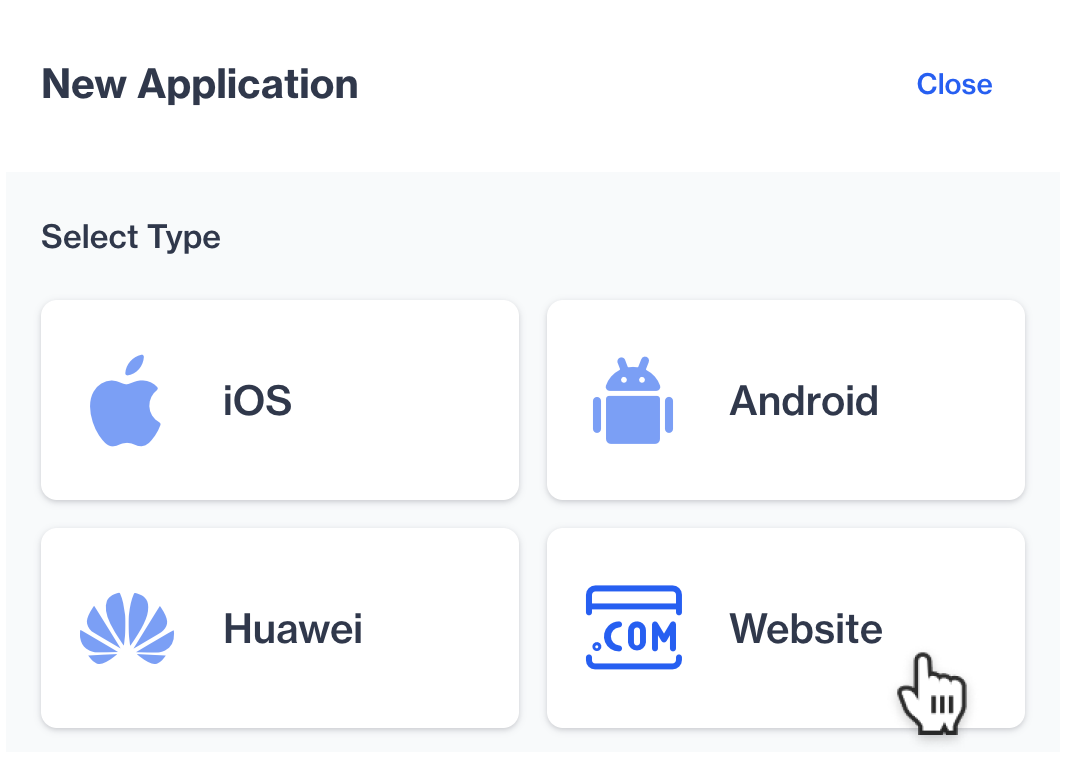
Website
1.3 Enter the application name, website domain URL and icon or badge URL.
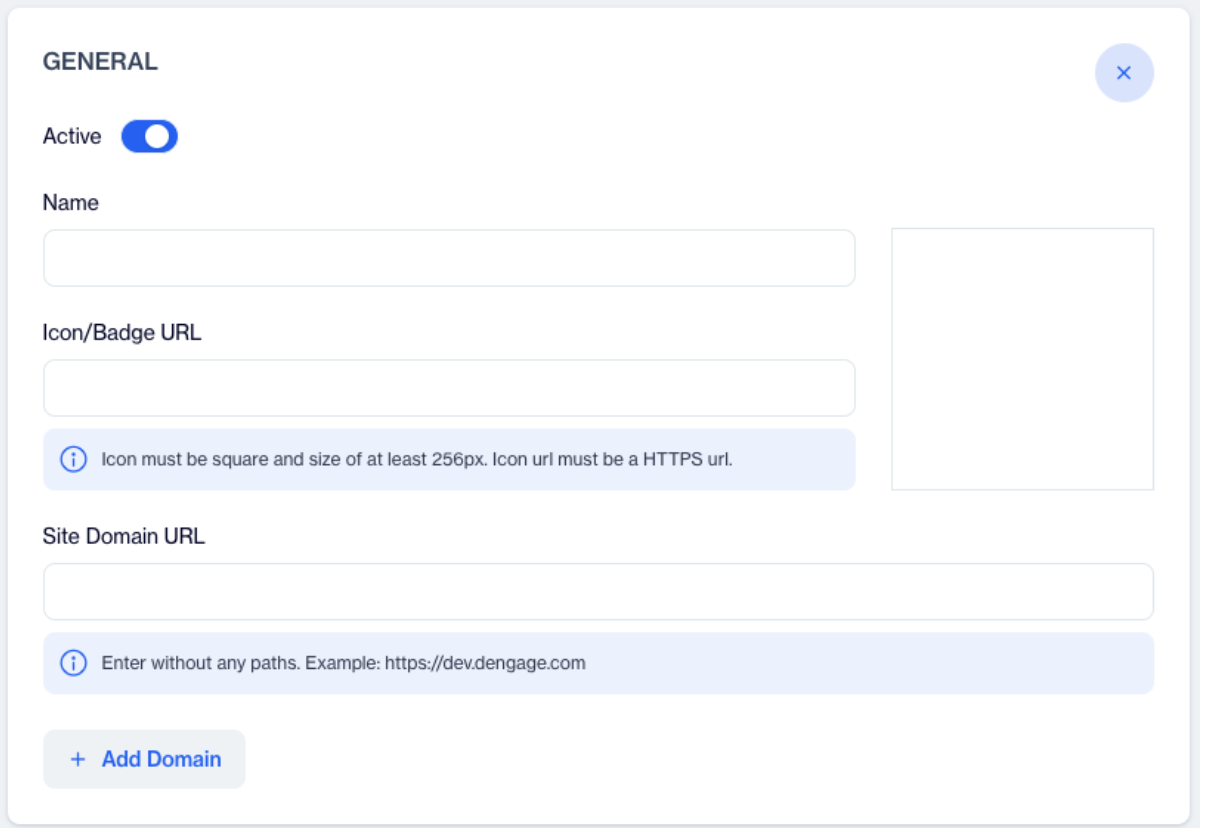
Website Application
1.4 Enable the Push Notifications.

Push Notifications - Enabled
1.5 Select the Custom Permission Prompt type. Open Settings to customize it.
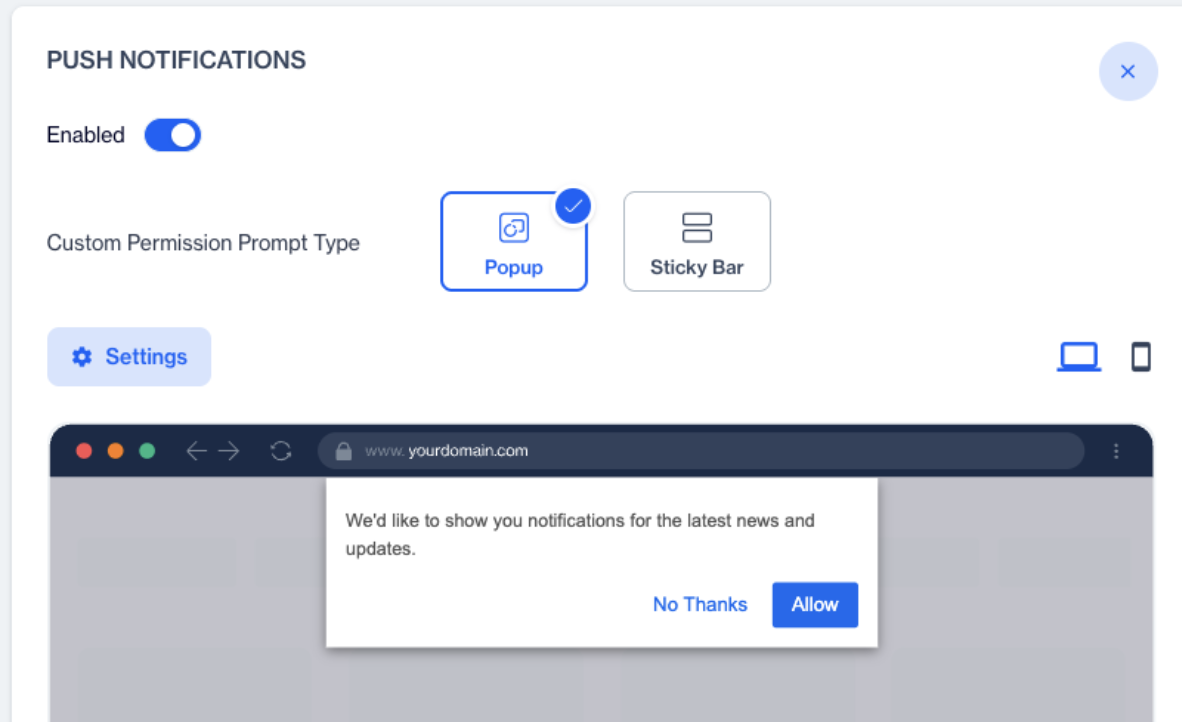
If you enable the “Show Permission Prompt on page load” option, the permission prompt will be shown automatically without awaiting a trigger.
2. Integrating the SDK into Your Website
Once you have created the Application in the D·engage platform, your website integration details will appear as shown below.
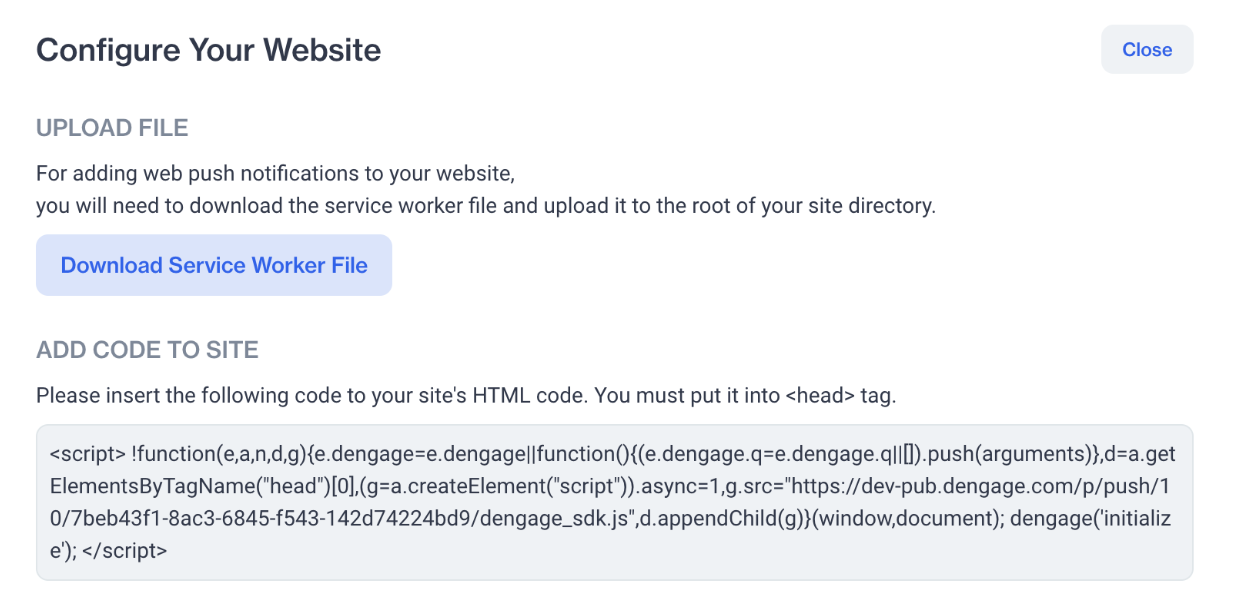
Web Application Details
2.1 Download the service worker file.
Download the Service Worker file and add it to your website’s root folder. Only one Service Worker file should be used for generating a Web Push token. If another Service Worker is already generating a token, it must be removed first before adding the D·engage Service Worker file.
2.2 Insert the SDK Injection Script.
Insert the provided code snippet into your website’s HTML code. If you enable the “Show Permission Prompt on page load” option, the web push integration will work automatically. Otherwise, you can manually trigger the notification prompt using the SDK functions.
3. How to Create an Apple Safari Web Push Certificate
These certificates are required to send web push notifications to Safari users on macOS.
Requirements
- An Apple Developer Account
- Access to Certificates, Identifiers & Profiles in the Apple Developer portal
- The Website Push ID you will use for Safari notifications
- A CSR file (Certificate Signing Request)
3.1 Create a Website Push ID
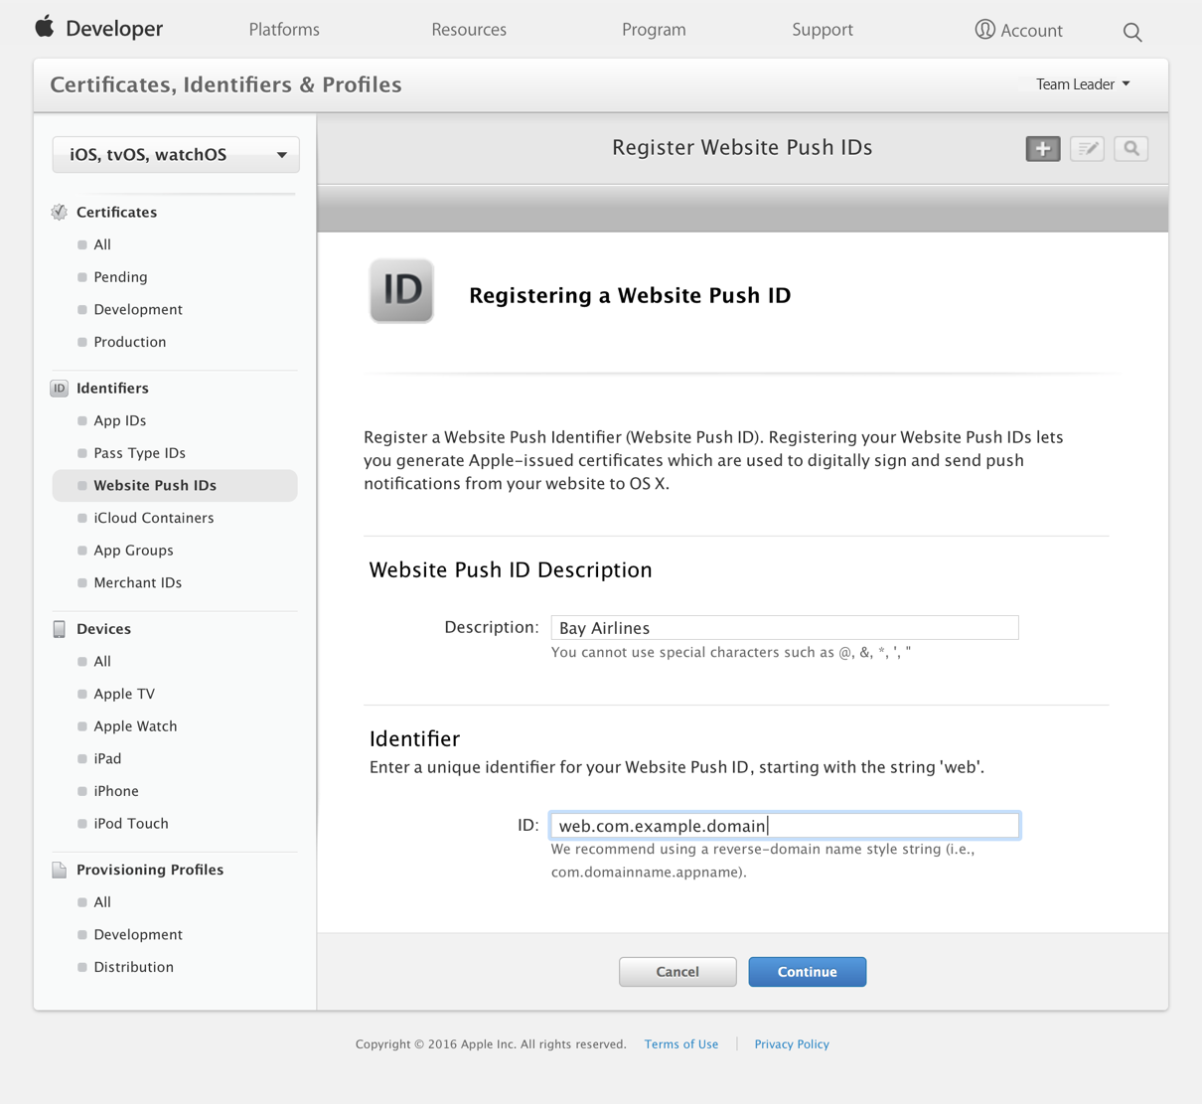
Website Push ID
If you do not already have a Website Push ID, create one using the steps below:
- Sign in to your Apple Developer account.
- Navigate to Certificates, Identifiers & Profiles.
- Go to Identifiers.
- Click the + button to add a new identifier.
- Choose Website Push IDs.
- Enter a description and identifier.
- Click Continue, then Register.
3.2 Generate a Certificate Signing Request
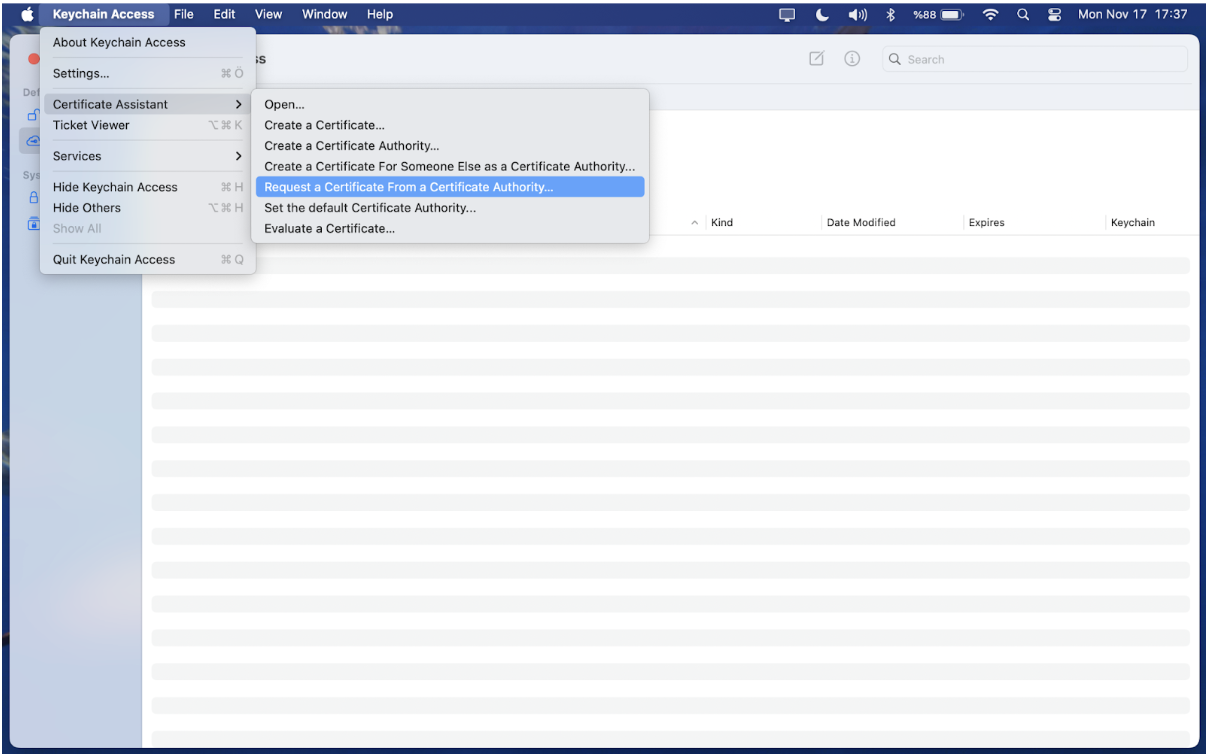
Certificate Signing Request
You will need a CSR file to create the push certificate.
On macOS (Keychain Access)
- Open Keychain Access.
- From the top menu, click Keychain Access > Certificate Assistant > Request a Certificate From a Certificate Authority.
- Enter your email address.
- Select Saved to disk.
- Click Continue and save the
.certSigningRequestfile.
3.3 Create the Safari Web Push Certificate

Create the Safari Web Push Certificate
- Go to Certificates, Identifiers & Profiles.
- Select Identifiers and locate your Website Push ID.
- Open it and scroll to the Certificates section.
- Click Create Certificate.
- Upload the CSR file.
- After generation, download the Web Push Certificate (.cer) file.
3.4 Export the Certificate as a .p12 File
D.engage website application will typically require a .p12 certificate.
- Double-click the downloaded .cer file to add it to Keychain Access.
- Open Keychain Access and find the certificate under My Certificates.
- Right-click the certificate and choose Export.
- Select Personal Information Exchange (.p12).
- Choose a password to protect the
.p12file. - Save the exported file.
3.5 Provide the Certificate to Your Application
Upload the .p12 certificate and password to your D·engage Website Application to activate Safari push notifications. Push Notification > Safari
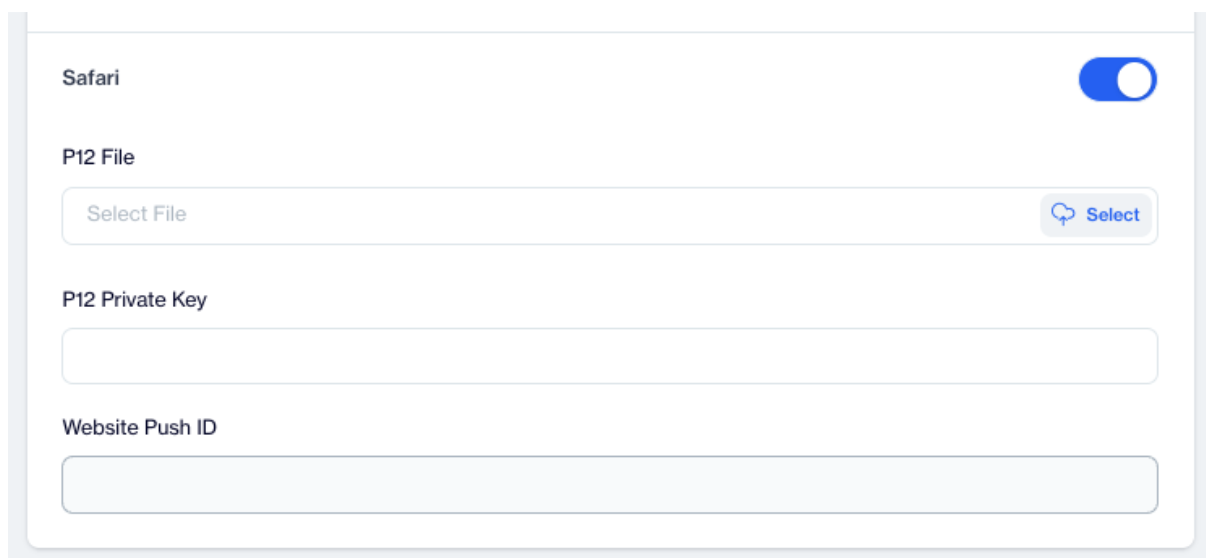
Push Notification > Safari
By creating a Website Push ID, generating a CSR, creating a certificate, and exporting it as .p12, you can successfully enable Safari Web Push on macOS.
4. Usage of the Web SDK
Once you insert the Injection Script into your main HTML file, the SDK’s core functionality starts automatically. This includes displaying Web Push Notification permission prompts and tracking notification subscriptions. Therefore, the initialization function is essential.
4.1 Triggering the Notification Prompt Manually
If you have enabled the “Show Permission Prompt on Page Load” option in the D·engage platform, you don’t need to implement this step. Otherwise, to trigger the prompt manually, use the showNativePrompt or showCustomPrompt functions.
The showNativePrompt function immediately displays the browser’s native permission prompt.
The showCustomPrompt function displays the custom prompt type you selected in your application settings. Once the user accepts, the native browser prompt will be shown.
If you have a button or banner for requesting notification permission, you can call showNativePrompt in its click handler.
4.2 Getting Notification Permission
You can use the getNotificationPermission function to retrieve the user’s current notification permission status. This function returns a string value that can be 'granted', 'denied', 'ignored', or 'default'.
4.3 Getting the Current Web Push Token
You can use the getToken function to retrieve the current Web Push token. This function returns nullif the Web Push permission has not been granted.
4.4 Checking the Web Push Browser Support
You can use the isPushNotificationsSupported function to check whether the browser supports Web Push Notifications. This function returns true if Web Push is supported.
4.5 Managing User Identification
When a user logs in, you obtain their user information, including a contact_key. You can set this contact_key to associate the user with their browser. There are two functions for setting and retrieving the contact_key.
If the user is logged in, set their user ID. This is important for identifying users. You can safely call this function on every page — it will not send unnecessary events.
To retrieve the current user information from the SDK, use the following function:
You can also get the current device ID from the SDK using the getDeviceId function:
4.6 Setting and Getting Country Information
For accurate tracking, the country information of web devices should be set on your website. You can use the following functions to set and retrieve this information:
Set the user's country:
Retrieve the user's country:
4.7 Setting and Getting Tracking Permission
You can use this function when the user does not allow cookies on the site.
Set the tracking permission: The parameter for setTrackingPermission should be a boolean (true or false).
Get the tracking permission:
4.8 Setting Cart Data
You can use these functions to store the user's cart data.
Use the setCart function to send the current cart data to the SDK. This function automatically calculates and adds additional properties to each cart item. These calculated fields include: Effective_price, line_total, discounted_line_total, effective_line_total
The function can be called using either the setCart name or its ec: prefixed version ec:setCart.
4.9 Setting Log Level
You can use this function to control the SDK’s log output in the browser console. This is useful for debugging or monitoring SDK activity.
Use the setLogLevel function to specify the desired log level.
Available levels are: none – Disable all SDK logs. info – Show informational and status messages. warn – Show warnings and errors. error – Show only error messages.
Log messages will be displayed in the browser’s developer console based on the selected level.
4.10 Exporting Logs
You can use this function to download the SDK logs as a JSON file.
Use the exportLogs function to download all available SDK logs in JSON format. The file will be saved to the user’s computer through the browser’s download mechanism.
4.11 Sending Device (Browser) Custom Events
Please refer to Custom Event Setup.
Related Articles
iOS SDK Setup
iOS SDK Setup Requirements D·engage Integration Key iOS Push Certificate iOS Device (you need to test on a real device for notifications) A Mac with the latest Xcode iOS version 10 or later (supported by D·engage Mobile SDK) Integration Methods ...Firebase SDK Setup
Requirements Google Firebase App Configuration Android Studio Android Device or Emulator D·engage Mobil SDK for Android supports version 4.4 (API Level 19) and later. D·engage Mobil SDK for Huawei supports all new versions. 1. Create Firebase App 1.1 ...New iOS SDK Setup
SDK Setup Requirements Minimum iOS version supported 11.0 SDK Installation CocoaPods Integration Dengage is available through CocoaPods. To install it, simply add the following line to your Podfile: Ruby pod 'Dengage', '~> 5.89' Run pod install via ...Huawei SDK Setup
Requirements Huawei Developer Account Java JDK installation package Android SDK package Android Studio 3.X HMS Core (APK) 4.X or later Huawei Device or Huawei Cloud Debugging Supports Android API level 4.4 or higher. Information Huawei AdID service ...Tagging - Web SDK
What is Tagging? A tag is a label attached to someone or something for the purpose of identification or to give other information in order to target later. The best use case for this feature is the preference lists on websites. Visitors may add ...